Tuesday, 7 June 2016

Lime plastering update

During May 2016 works were progressing well with most first fix services installed and now lime plastering getting underway. We had obtained pre-haired lime plaster in bulk bags from Mike Wye to save mixing time and for consistency. See pictures below to highlight the areas. 
Note that the walls near chimneys or where damp penetration issues were present we were trying the 'Bull shit' mix for lime plaster, i.e. mixing cow muck (Bull muck preferred to reduce urine content) and mix with the base lime to counter the effects of salts and tars from within walls, hence some of the pictures show darker lime than original lighter colour. 
Main bedroom gable wall lime plaster removed, note damp issue from chimney 
First scratch coat and cow dung mix is darker shade
Second coat being applied
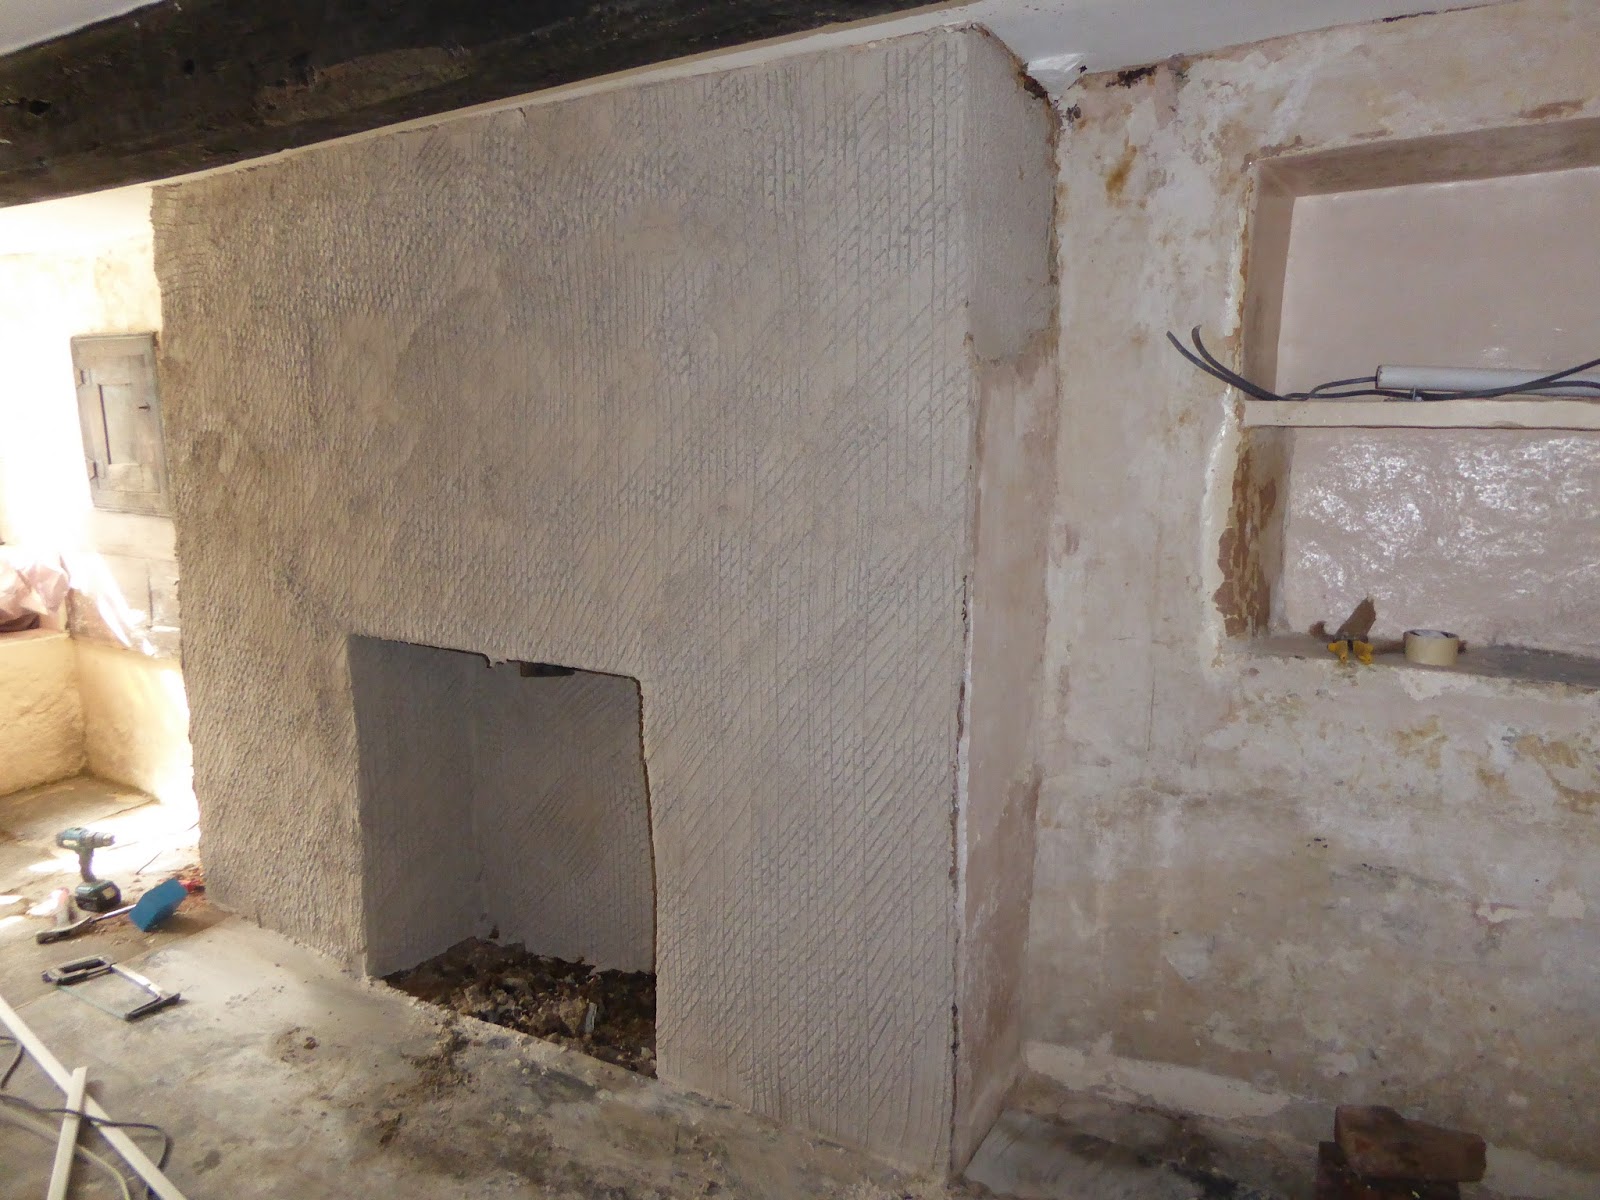
Ground floor 'dining room' old fireplace stripped off
Note local Furness brick company products 
First scratch coat applied
'Cow muck' mix applied to inner stove reveal
Bedroom #2 chimney stripped
Scratch coat applied, 'cow muck mix'
Top coat applied (ceiling still to do)
Bulk bags of lime plaster
Top coat lime and lime wash
Mike Wye traditional haired lime

Monday, 23 May 2016

Another hidden wall cupboard revealed...or old fire window

During the lime plaster repairs we came across a previously hidden wall cupboard, this is in the ground floor living room and also in the external wall adjacent to the window and next to the mahogany cupboard, so possibly a fire window. 
Opening exposed when plaster removed, slate was covering the hole.
Possible fire window, albeit there are bricks to the left hand side

The window opening will obviously be kept, we will insulate the space and block up and plaster in lime.

Wednesday, 4 May 2016

Whilst we were digging drain runs....

...we found a hole, the digger driver, Keith, had to remove a large stone along the pipe route and found a hole full of water. He used a 4m scaffold pole which was lying around the site to see how deep it was, the pole went in nearly the whole length and hit the bottom, with the water over 3.5m deep.
So having no idea what it was we had to arrange to get the hole pumped clear of the water so we could see what was down there and how safe it was.
See the hole in the foreground, it was covered by a large stone
Measuring the hole, note full of water
Camera view as no way to get head in hole! Note the roof is arched and made of stone
Scaffold pole being used as a measure...
...this is how deep it is, it swallowed a whole length of scaffold pole!
Once it was pumped out we could see a little deeper and could make a photographic record. The sides seem to have been made of rock, fairly sheer and no drain holes, so it could have been a well. It is near to the house so not sure if it would have been foul drain, more likely a well?
Looking down from above, see two sides very smooth, other sides are chiseled, width about 1.2-1.4m
Side view, quite smooth considering nearly 4 m deep and presumable cut by hand
Arched stone roof, only about 300mm below ground level
another view from above, all taken by pointing camera into hole
view of hole from above ground level, showing arch stones.
After the photographic record and a video was recorded, for safety the well was filled with 20-40mm stone, both to support the well, the roof and in case anyone came across it and fell in, especially dangerous if filled with ground water, due to smooth sides and small space. 
It has been recorded on the National Trusts record system for that property.

Monday, 2 May 2016

More bed cupboard photos

This bed cupboard is a rare example in Cumbria, because there are not many left. The farmhouse as a whole is a good example due to the fact that many historic features have not been removed (which is what often happens when properties are 'modernised' over the years), builders usually find it easier and cheaper to remove and replace, hence the National Trusts conservation strategy;
"…considering the careful management of change. It is about revealing and sharing the significance of places and ensuring that their special qualities are protected, enhanced, enjoyed and understood by present and future generations."
Here are some more bed cupboard photos as a record of condition and construction, taken in April 2016.
The current plan is to leave the bed cupboard in it's present day state, in order to best preserve the historic features and visual condition, without damaging it for the future.
View showing old doors into front living room, see bed base timber rails near the floor, with holes for hemp rope to support mattress of some kind (see close up photo later on).
NB:The new outer door frame is visible to the right hand side.
View of rear wall, this is an end gable wall, the black grey finish is damp mould, timber panels to bottom half (note slate sconce on brick dwarf walls a later addition).
Old window now opening to utility room, this will be kept to afford ventilation to bed cupboard.
Old window opening, note lime plaster poor condition in places
Closer shot of lime plaster, top skin gone, plenty of hair visible
Back gable wall 
Looking through the old window opening into the utility room (being a later addition with lean-to roof), now to house boiler.
View looking back, you can see part of the new timber stud frame and doors, these have been added to make the bed cupboard secure, but still allow access in the future. 
Rear corner view 
Lime plaster above slate sconce shelf deteriorating
Rear wall paneling and old bed support
Close up of rear left hand corner, see stone wall 
See the two bed support timber rails remaining
Another view of the bed support rails 
Close up of bed rail showing old hemp rope used to support a mattress of some kind. Some say the phrase 'sleep tight don't let the bed bugs bite' refers to making sure the ropes were pulled tight so the bed did not sag (I am not so sure but it's a great story:)
See the corner support post, there are three remaining, rounded on shape
Junction between bed rail and corner post. 
Rear junction with two rails meeting right hand side post
New recycled doors added to protect the bed cupboard, the doors were from the old cylinder cupboard! 

Wednesday, 20 April 2016

Plaster repairs reveal more information...

There was some damaged lime plaster to bed 1 (caused by water ingress over the years) and so this was to be removed and re-plastered in traditional lime, using horse hair to aid strength to scratch coat.
In April when the plaster was removed from the east gable wall in first floor bedroom, this revealed timbers set within the gable wall (see photos) and these look like they could have been old ceiling timbers, before the ceilings in the two main bedrooms were raised to give a better head height.
See also the bottom photos, showing details of masonry and timbers above the fireplace to main living room chimney breast.
First floor Bed #1 old water damage to plaster
Bed #1 damaged plaster
April 2016 old lime plaster removed, see some plaster is darker to centre and left, lime plaster is lighter to RHS, not sure if this is the aged effect of water ingress?
See RHS mortar appears lighter
See a line of timbers, a wall plate, joist ends and boards above (could be old floor boards), joists in place now are the higher ceiling level.
Plaster removed to hallway reveals an old timber (looking as dusty as the stonework) but with giveaway axe marks.
Main living room fireplace chimney breast exposed, see corbel detail above and many timbers near the top.
Corbel and timbers near top
The other chimney breast in the (new) dining room, again various masonry sizes to bricks.